
Comprehensive
Measurement Directions
It is not necessary to use an outside seamstress to measure if you follow these directions and we do not recommend it since the measurements must be done our way. Photos show proper placement of the tape measure and there are extra tips to get the best accuracy. When you place your order a designer may have you go back and take some different measurements. Skaters and wrestlers will require additional measurements.
MEASUREMENTS NEEDED FOR ALL COSTUMES - for a sleeveless leotard style: BUST, WAIST, HIPS, HEIGHT AND GIRTH (right and left side). With long sleeves:- SLEEVE LENGTH , UPPER ARM, FOREARM and WRIST. Include the AGE of the costume wearer.
PREPARE FOR MEASURING - What a person is wearing can make a big difference in accuracy and how easy it is to measure and get proper placement of the tape measure. What should be worn can be underpants and a bra (if needed), a leotard, or tight fitting tank top and bike shorts Do not measure in jeans, this will add to the girth and hip!
For GROUPS we recommend that ONE person measures the whole team
Do not do measurements on YOURSELF. Get someone else to measure you.
When measuring girth if either side is longer than 60" and your tape measure runs out do not guess the additional inches.. Get a tape longer than 60" or tape another one to the end of your existing tape.
GROW ROOM - costumes are cut to fit to the measurements you supply, we do not allow for grow room. If you would like grow room we suggest you take the exact measurements first and then �pad� them with any additional increments after that. We no longer guarantee the fit when you add grow room. If you are unsure you may discuss this with a designer when you place your order and we can suggest, based on your final expectations for the fit. If grow room is added to a person with a deep sway in the small of the back it will fit that area poorly. A grow pleat can be added to any costume with a skirt for an additional fee of $18.
If you wish to print this document, please go to the address -- http://www.showoffinc.com/measurement_print.htm or click measurement_print
HEIGHT - (not illustrated) crown of the head to the base of the heel taken in back.
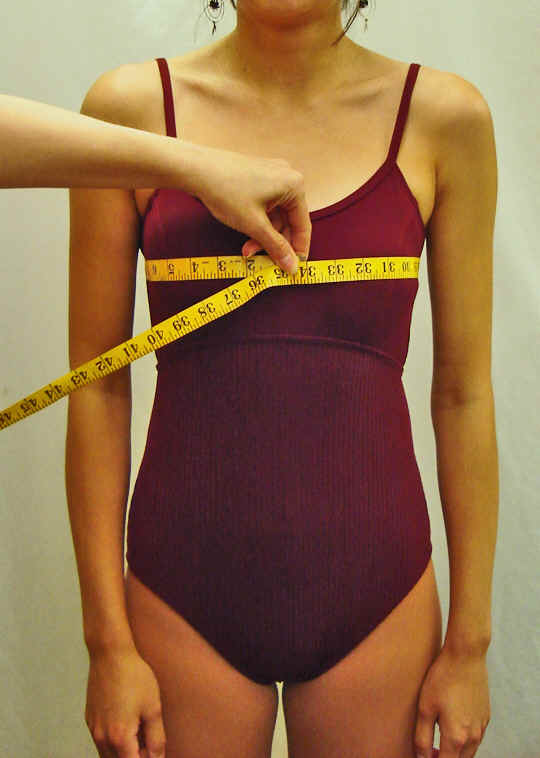 |
BUST
Draw the tape directly around the back to the bust line center. Tip - Make sure the tape is parallel going around the back to the front and not falling down past the shoulder blades in back. |
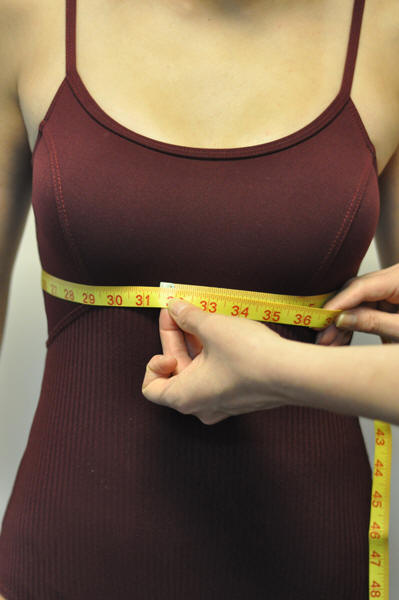 |
UNDER BUST
Draw the tape directly around the back to the under bust/bra line center. |
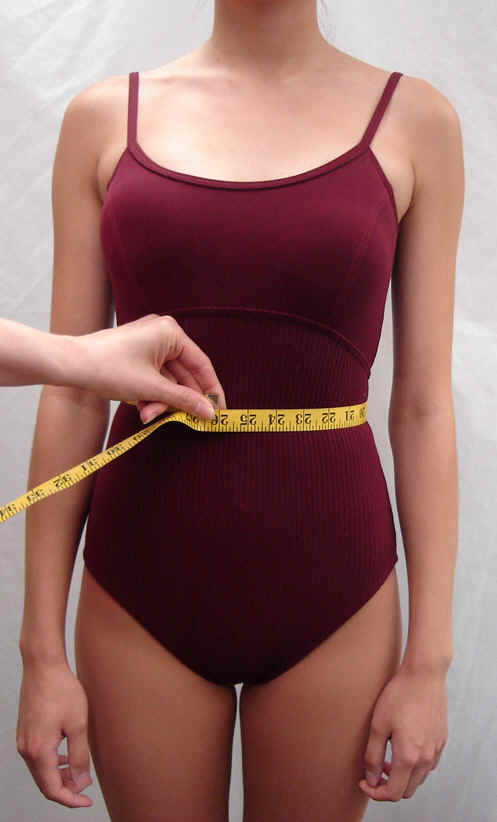 |
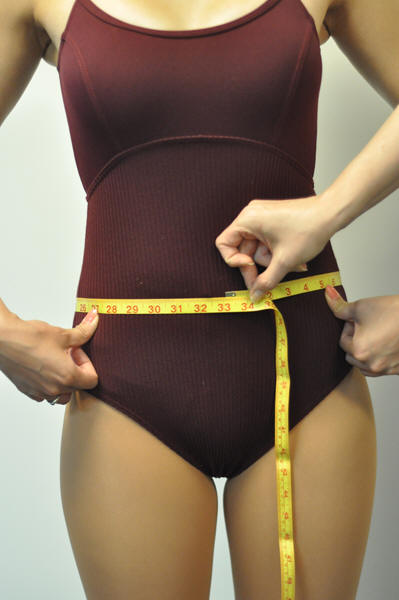
WAIST Draw the tape around the narrowest section of the �natural� waistline .This is the area between the belly button and the bottom of the rib cage. Tip - If you cannot find the narrowest section have the person being measured bend to the side so you can see where it creases and take your measurement there. |
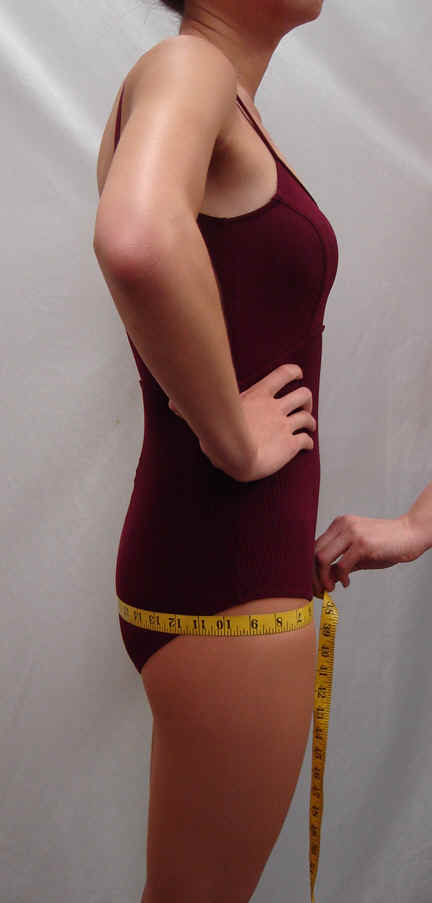 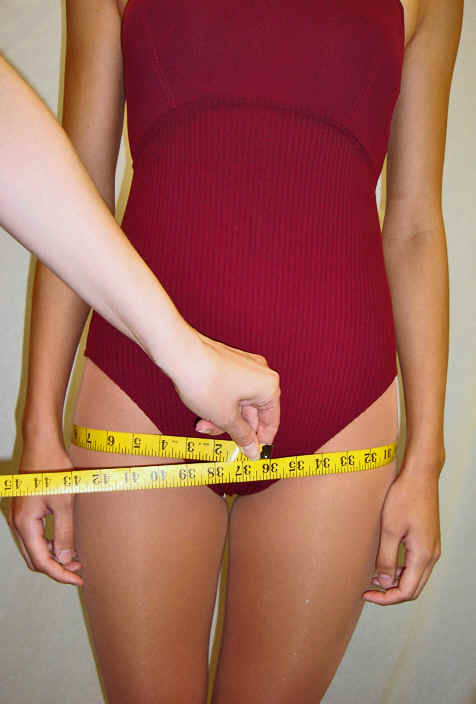 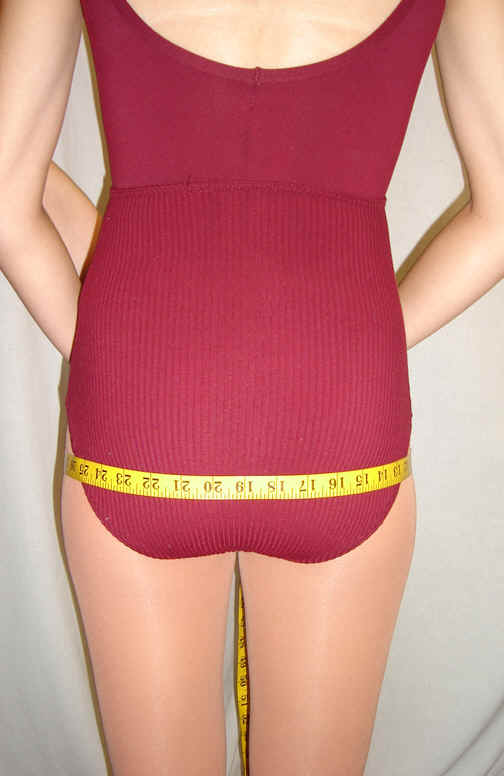 |
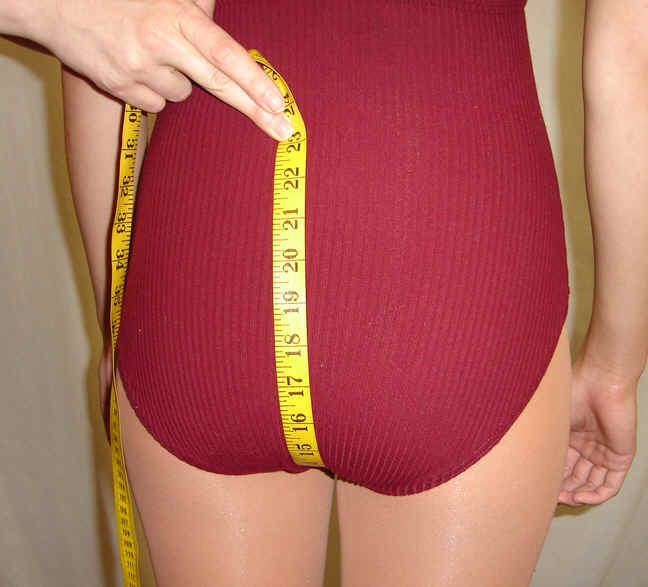
HIPS Draw the tape around the thickest section of the rear end . This usually will fall in front of the crotch when you come back to the front. |
  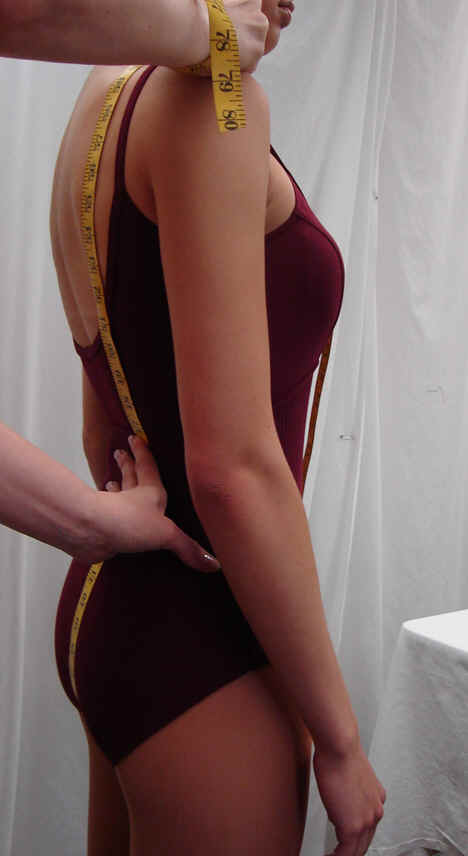  |
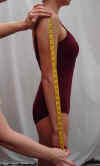
GIRTH Stance should be straight up but shoulders relaxed, feet shoulder distance apart, toes straight ahead. Start the tape at the top of the shoulder in the middle (where a bra strap would be) , take it past the bust, thru the crotch back up to the same place on shoulder where you started and then press the tape flat against the small of the back. Measure the right and left side. We will cut to the largest of the two measurements. Most people have a slight difference 1' or under . Tip - Make sure the tape measure is not pinched low between the thighs or getting a wedge in the behind. If you notice a lot of curvature in the small of the back when you push in you will need to inform the designer who takes your order. We call this a "deep sway". |
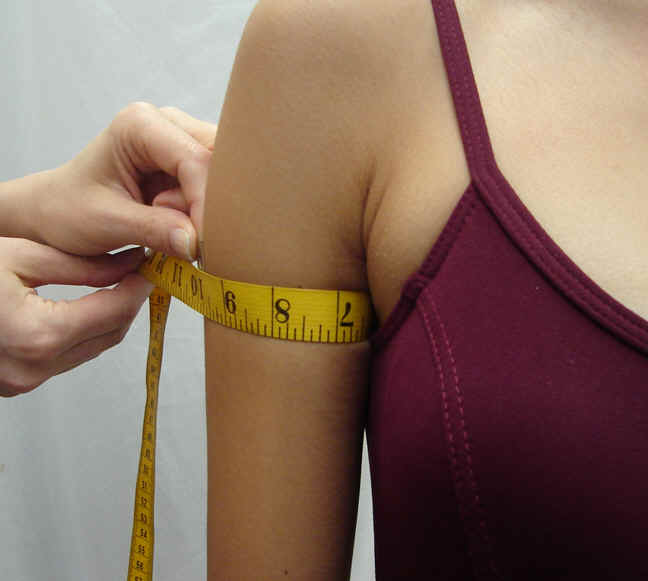 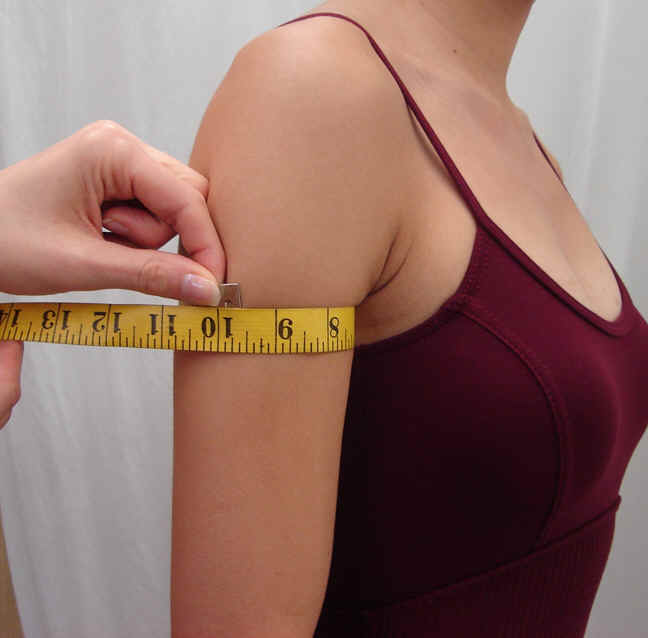 |
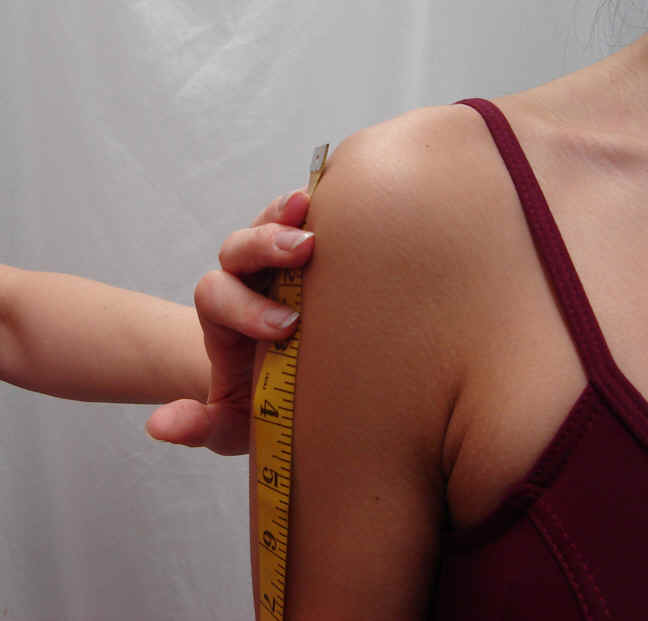
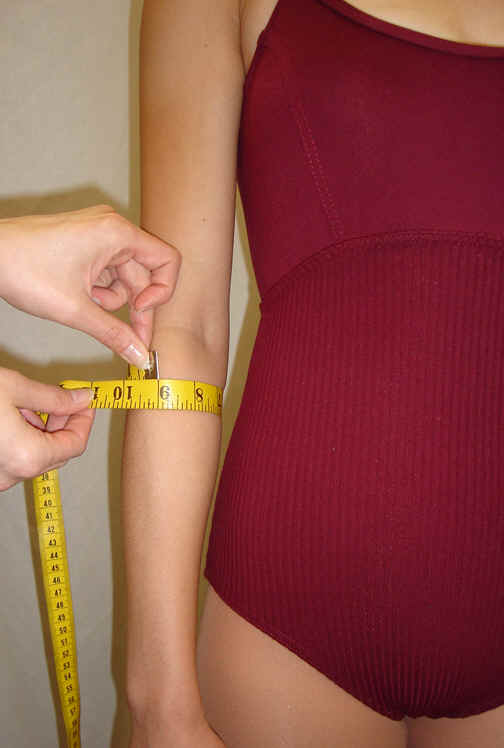
UPPER
ARM Circumference- draw the tape around the upper arm about an inch or so below the armpit. |
 |
FOREARM Circumference - place just below the elbow and draw the tape around. |
WRIST - (not illustrated) circumference of wrist taken at the wrist bone.
  |
MITTS- LENGTH AND CIRCUMFERENCE Two (2) photos represent best suggested mitt lengths to choose from. Top of mitt is best to stop either just below the elbow or approx. 2'' above elbow. Place tape at middle knuckle on hand ( not finger) and draw directly up to just before the elbow OR approximately 2' above CIRCUMFERENCE - Take measurement around the top where you choose to stop the length. |
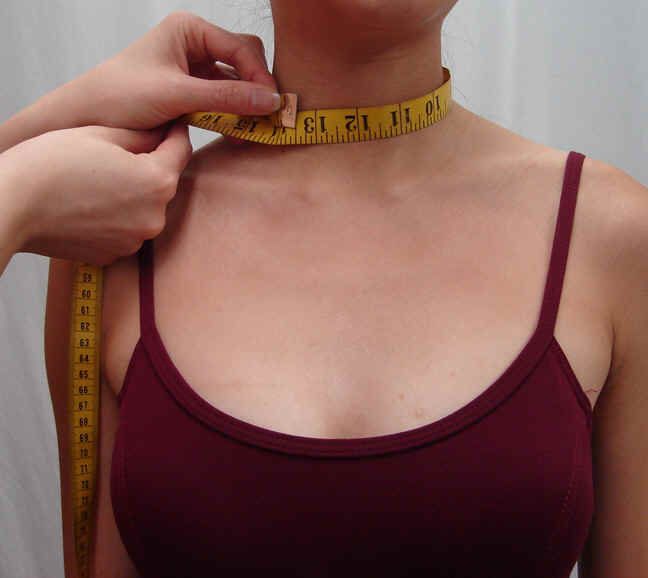 |
NECK
Take this only if your costume will have a turtle neck . Measure around the neck just right above the base. |
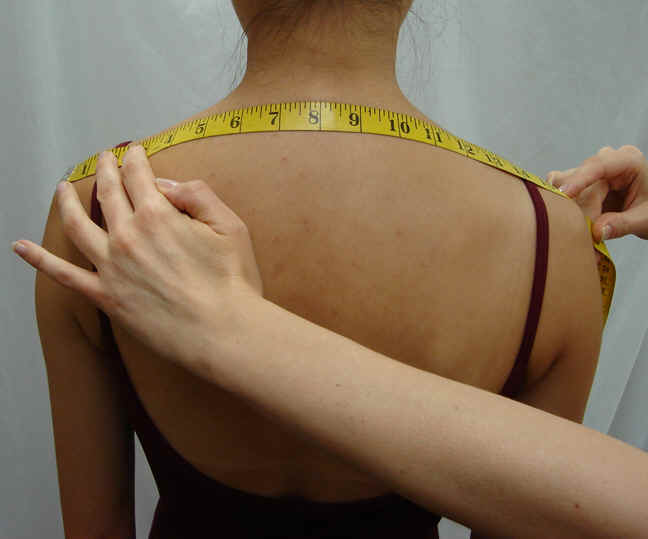 |
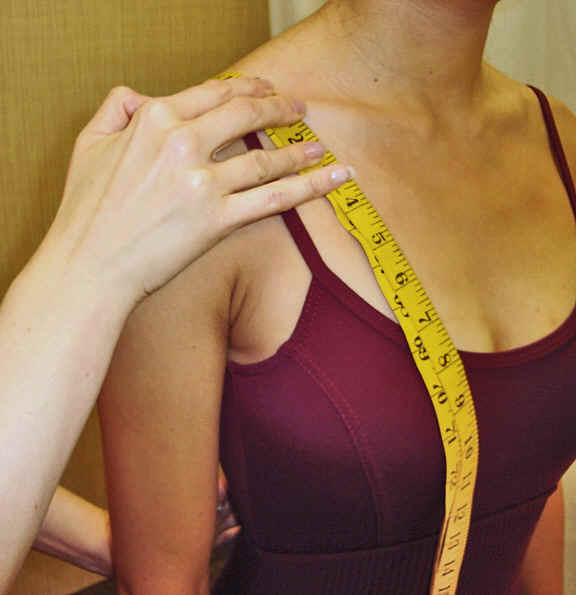
ACROSS
BACK This is usually needed for men or others that have shoulders that look especially wide compared to the rest of the body. Tape goes from the edge of the shoulder on top, across the nape of the neck , to the edge of the shoulder on the other side. Tape should not go vertical on the arms. |
  |
RISE
Only needed if you are ordering pants or a 2 piece costume and it helps decide the proper height for a waistband. Discuss with the designer prior to measuring on how to determine placement for the tape to get the correct height. Place the beginning of the tape in the front facing down where you would like the top of the waistband to start, draw thru the legs to the top of the waistband where it should end in back. |
 |
CIRCUMFERENCE AT HIPBONES (per designer request) Place tape at the very top of the "hipbones" which can be found by pressing in at that area. WAISTBAND CIRCUMFERENCE (for two-piece costume, pants, trunks, shorts, separate skirt) This measurement is different than the natural waist and is to be decided by wearer in relation to what looks good and covers. Do the "RISE" measurement first. After completing the "RISE" measurement, immediately place the tape around the body at top of where "RISE " has been decided to measure circumference of where the waistband will be sitting. |
 |
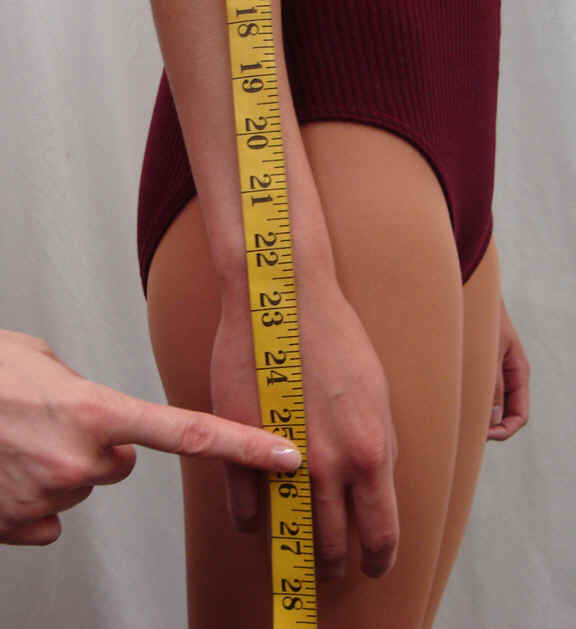
INSEAM (for pants) Start tape on the inside of the leg next to crotch and draw directly down to floor OR IF FOR SHORTS where you would like the shorts to stop. |
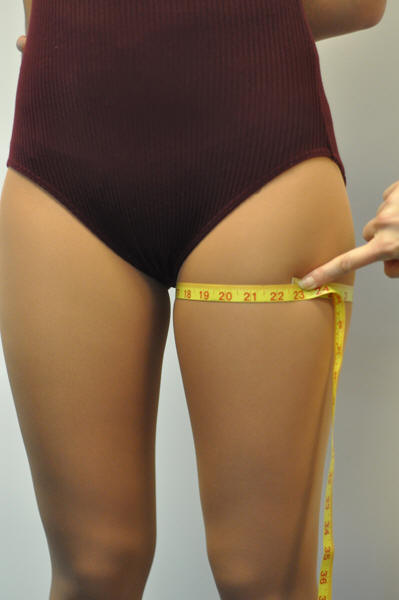 |
THIGH CIRCUMFERENCE Place tape at widest section of thigh at the top. |
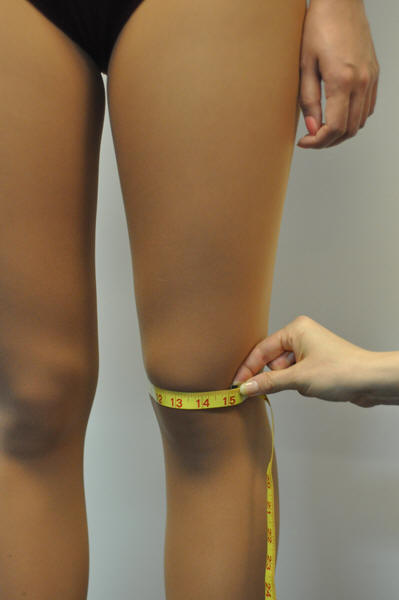 |
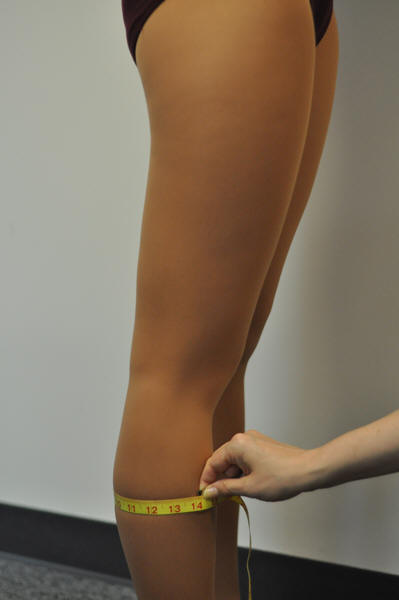
KNEE CIRCUMFERENCE (for pants only) Place tape in middle of knee at crease. WRESTLERS -Wear knee pad for this measurement if you will wear pads UNDER your FITTED tights. |
 |
CALF CIRCUMFERENCE (for pants only) Place tape at widest section of calf. |
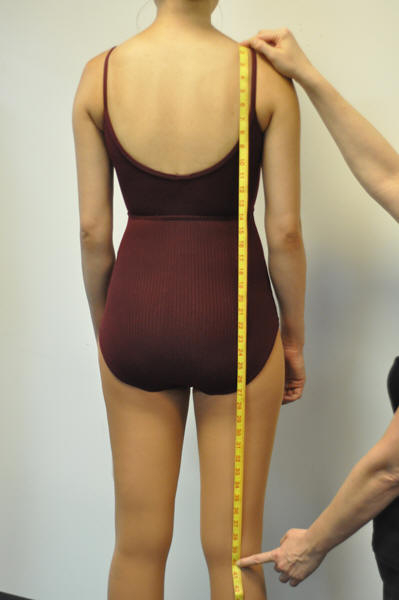 |
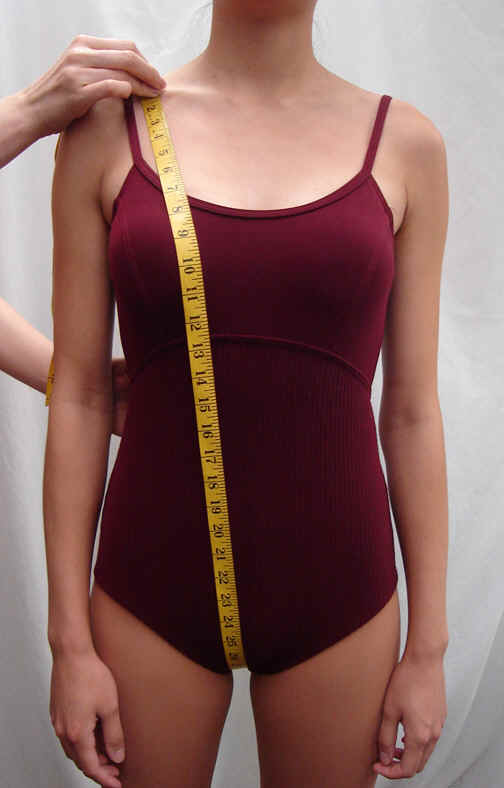
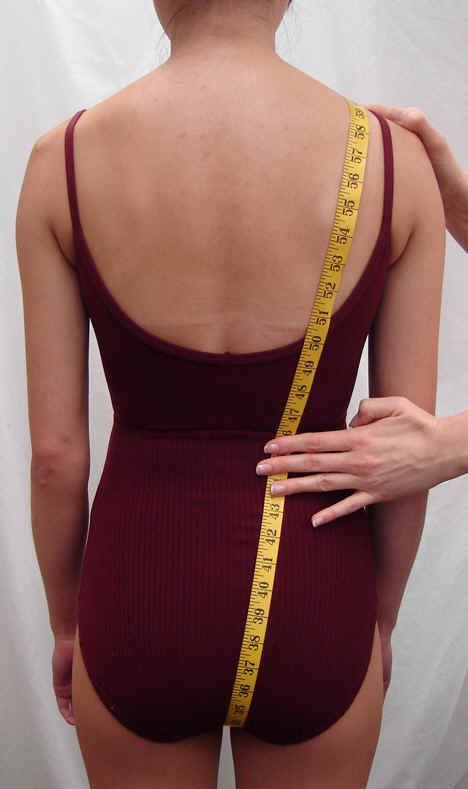
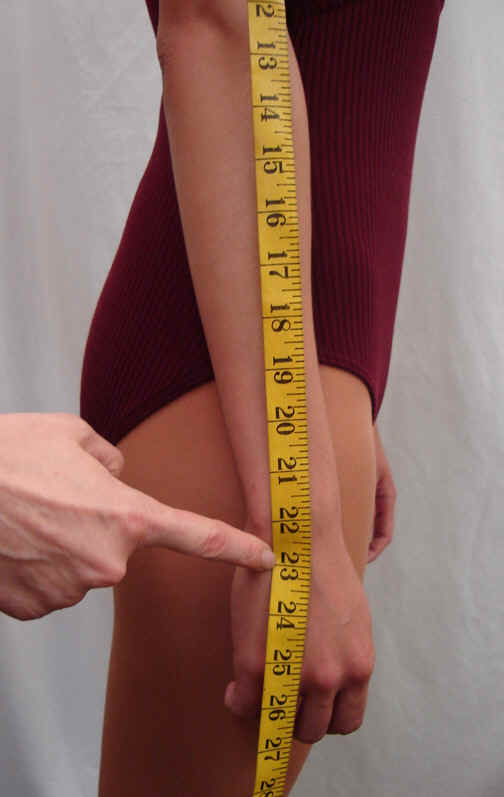
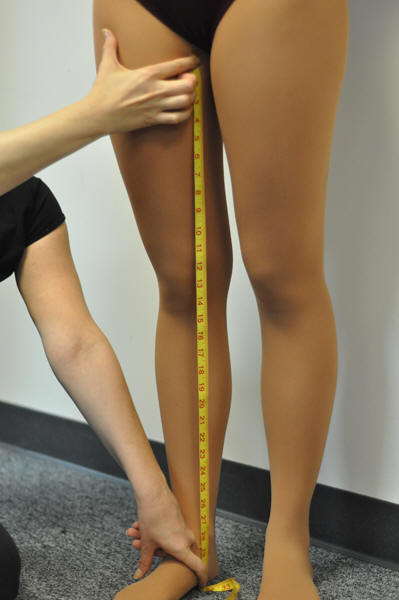
SHOULDER TO CREASE OF KNEE In back, place tape measure on the shoulder between the neck and the arm. Draw tape directly down to crease of knee. DO NOT push tape in anywhere to follow contour. |
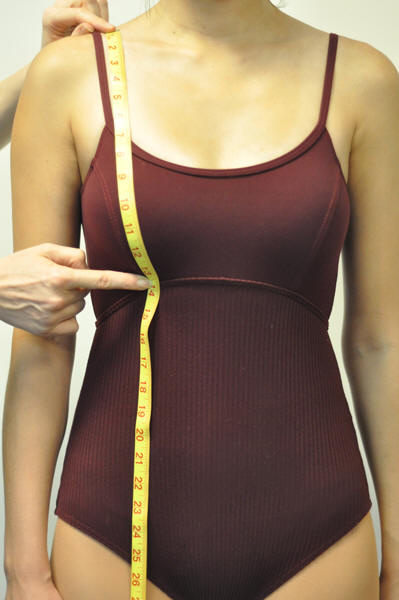 |
SHOULDER TO UNDER BUST (take only upon request by designer or if you are very full busted) Start tape at the shoulder between the neck and the arm, draw directly down to under bust/bra line following curve of bust. |